You do not mess with solid concrete; that’s what you probably think when you see a concrete surface.
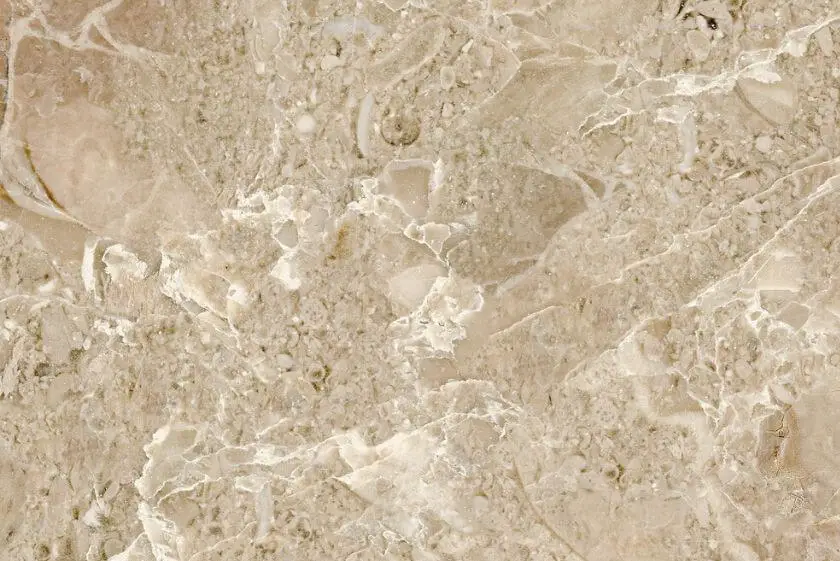
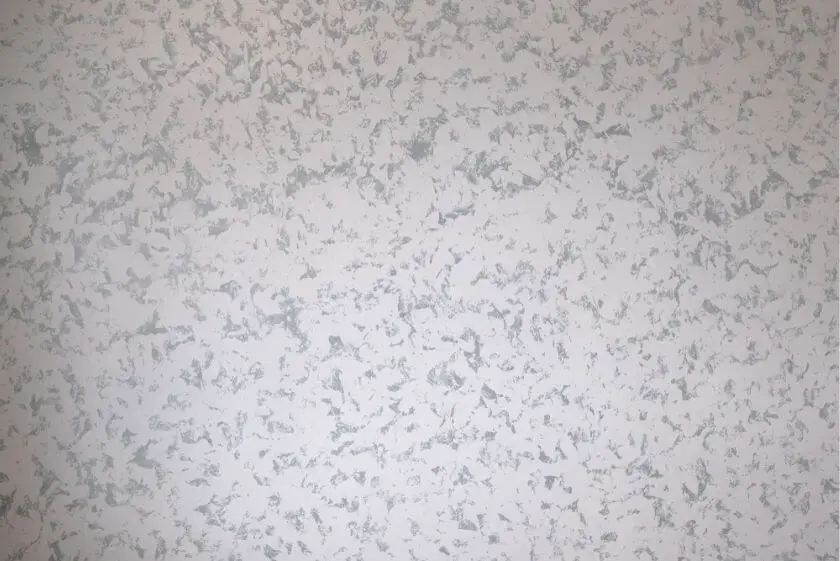
Concretes seem too hard to handle as it gives a very strong vibe; however, it is the complete opposite of what you think. Staining a concrete surface can completely change its look with bright and vibrant colors from the dull and dark concrete color.
Anyone with patios, garages, porches, basement, and sunroom need not worry. Instead, take out some time for some remodeling. Due to various beautiful and unique shades, staining brings the dull part of your house out of depression and makes it vibrant.
Be it indoor or outdoor concrete, staining, sealing, removing stain has become quite easier as new products are available in the market. Also, guidelines on how-to-stain-concrete will always accompany you in this solo work zone.
In this detailed article, you will find everything you need for the simple process of staining, and all that comes along.
Let’s get to it.
Simple Steps to Stain: New Concrete to Old Concrete
Staining is not only for new concretes at your house, but it also works on old ones as well. As concrete lasts a long time, it can lose its shine. Due to the age and condition of the concrete flooring, staining works differently on different concretes.
This section focuses on how to stain the concrete floor and makes it easy for you.
However, before staining, we need the proper materials to work with, therefore ensure you have all the following.
Materials Needed
- Concrete Stripper: This is needed for sealed concrete surfaces as the stains would not penetrate if the top is sealed.
- Concrete Cleaner, Detergent, or Degreaser: In order to stain, the surface needs to be cleaned thoroughly so that all contaminations are eradicated.
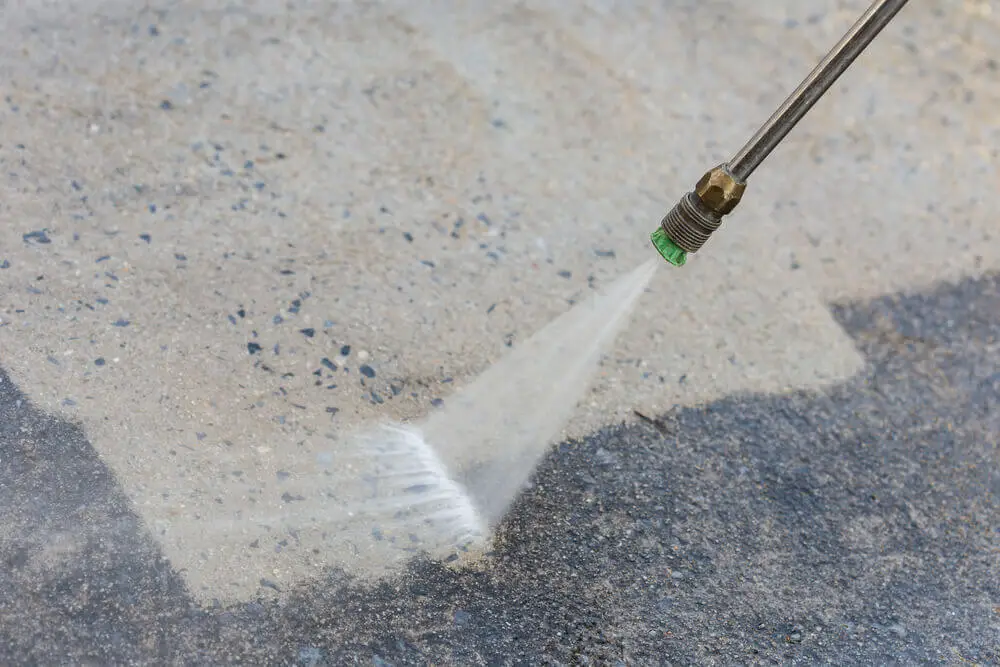
- More cleaning tools: Pressure washer, hose, vacuum, scrub brush.
- Etching Solution: It is used only when the water-based stain is applied.
- Neutralizer: Applicable for only acid stains.
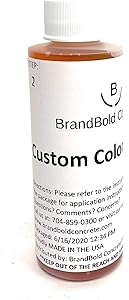
- Preferred Concrete Stain
- Staining Tools: Roller, sprayer, plastic bucket, scraper, plastic sheet, and tape.
- Protection Gears: Mask, goggles, rubber boots, and gloves.
Steps to Stain
1. Check Old Concrete
Before staining, you must check the concrete’s condition as age and exposure can take its toll.
Concrete with substance contamination prevents the stain from soaking in; therefore, check for glue, oil, wax, grease, paint, sealer, or anything else that will hinder the staining process.
Test the concrete by simply pouring water on it; if it soaks in, you are good to go with staining. However, if the water sits on top, you need to seal the surface first.
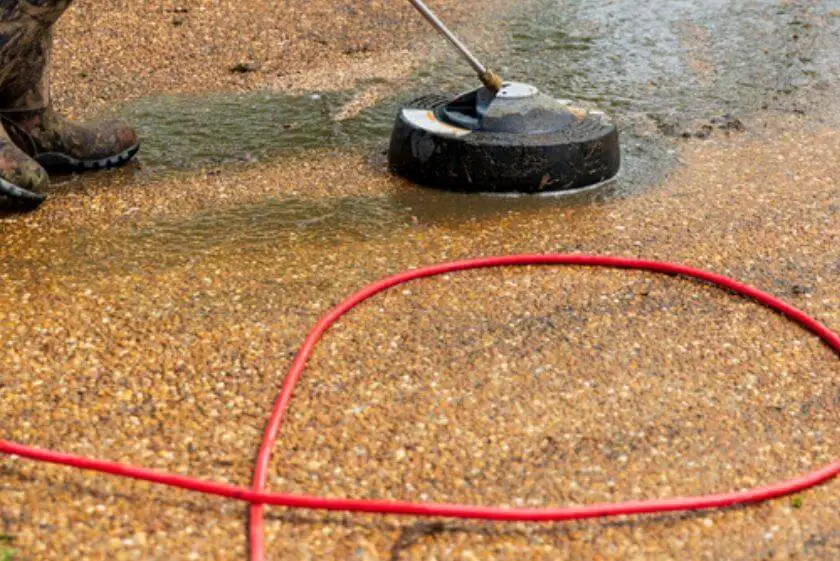
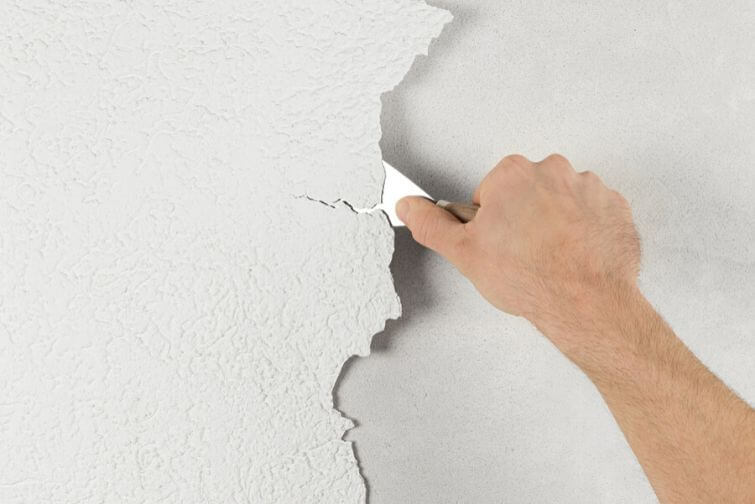
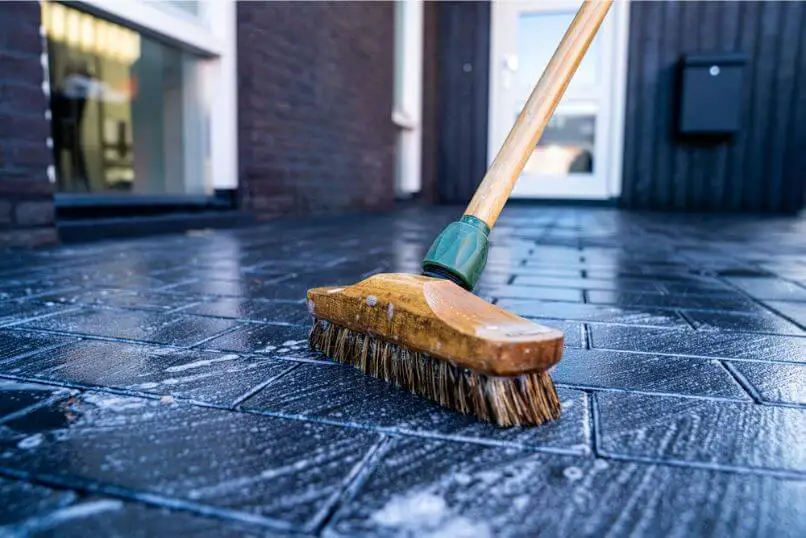
2. Strip & Clean the Concrete
Usually, concretes are contaminated with various substances over the years, which refrain stains from doing its work. Therefore, you need to strip the sealer before staining.
However, even if it is not contaminated, you need to power wash and clean to prep the surface thoroughly before applying the stain.
In this step, you basically remove previous stains or damage. For further details, check the section for removal.
3. Choose the Stain
For your concrete, you need to select the preferred color, and also the stain that’s appropriate for the condition of the concrete. It can be either water-based stain or acid-stain. It is a matter of personal penchant.
Acid-Based:
The Acid-Based Stain has a small number of metallic salts and hydrochloric acid for stain color. When used on concrete, there is a reaction between these two chemicals and calcium hydroxide in the concrete. For this, it gives permanent staining for both indoor and outdoor concrete items.
However, the shades are very limited for the acid-stain palate. Often, it gives an appearance of marble or stone with its uneven mottled look. Also, due to the acid in this type of stain, neutralizer needs to be used before sealing the concrete.
Water-Based:
The Water-Based Stain is simply a mixture of water, pigment, and polymers. These stains make sure you have more choice when it comes to shades. It stains more uniformly and can be diluted to get a darker or lighter stain on preferred areas.
Moreover, it is environment-friendly and easy to use with fewer materials and labor.
4. Test Stain on Concrete
For avoiding mistakes and redoing the whole process, you need to see whether your choice of stain actually works with the type of concrete.
On a small area of few square inches, apply the acid stain in 3-folds if the concrete is old. For water-based stain, also apply in a small area to check the stain color on your concrete floor.
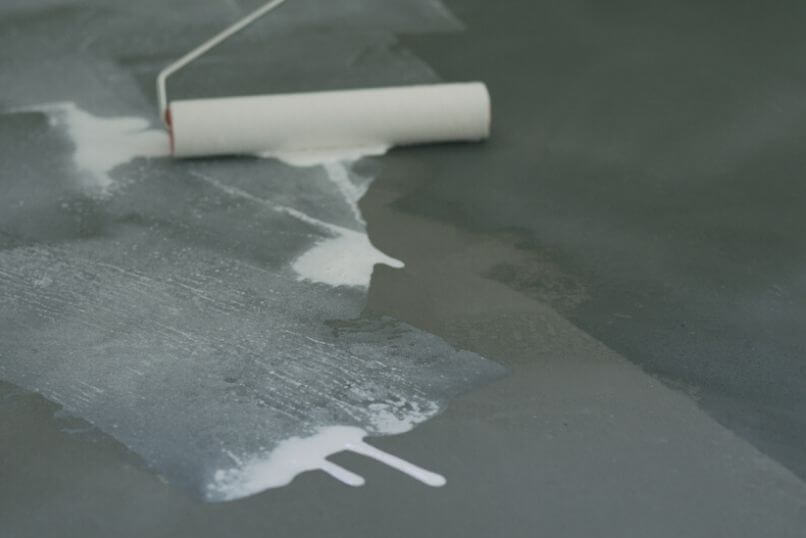
5. Apply the Stain
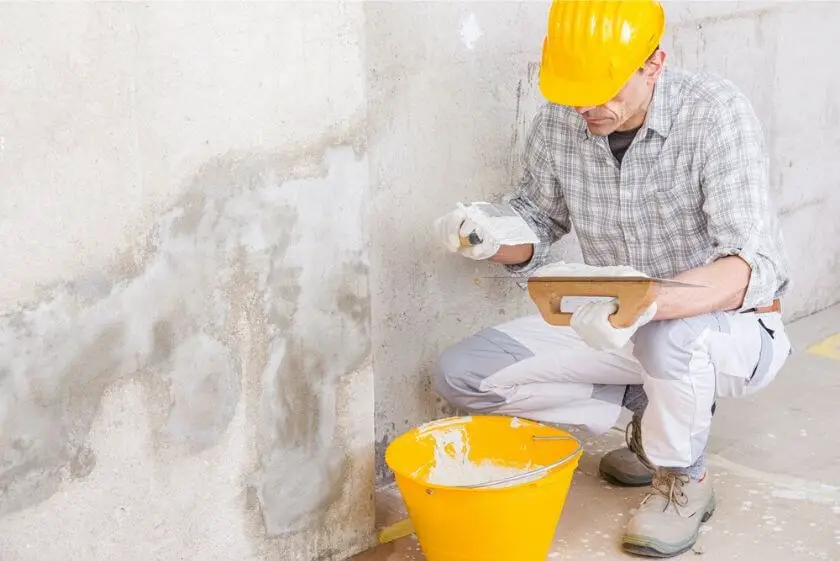
- First of all, you need to cover up the walls, door frames, etc. with a plastic sheet to prevent accidental stains.
- Next, make your customized water-based stain for a lighter or darker tone with a precise ratio. Acid-stain does not need any customization.
- For the first coat of stain, it is best to use a brush or spray. Proper coating for critical areas needs to be done with a brush or sponge. Sprayers such as airless or pump sprayers, protective guns can be used to give an overall coating.
- Then, let the stain dry for 24 hours; however, the time varies due to the weather: a rise in temperature, less airflow.
- Also, if you want more intensity in the stain, you can do a second coating after it is dry for a few hours.
6. Post-Stain Cleanup
Cleaning up the stained concrete is necessary to get an even and precise finish to your concrete surface.
- Firstly, you need to wash the stained floors by rinsing it with clean water.
- Furthermore, if you have used acid-stain, you must neutralize the concrete by baking soda or ammonia, or a neutralizer product.
- Then, take a soft brush or bristled broom to clean up any stubborn leftover bits from stain coating. Next, just finish it with a final rinse of the concrete floor.
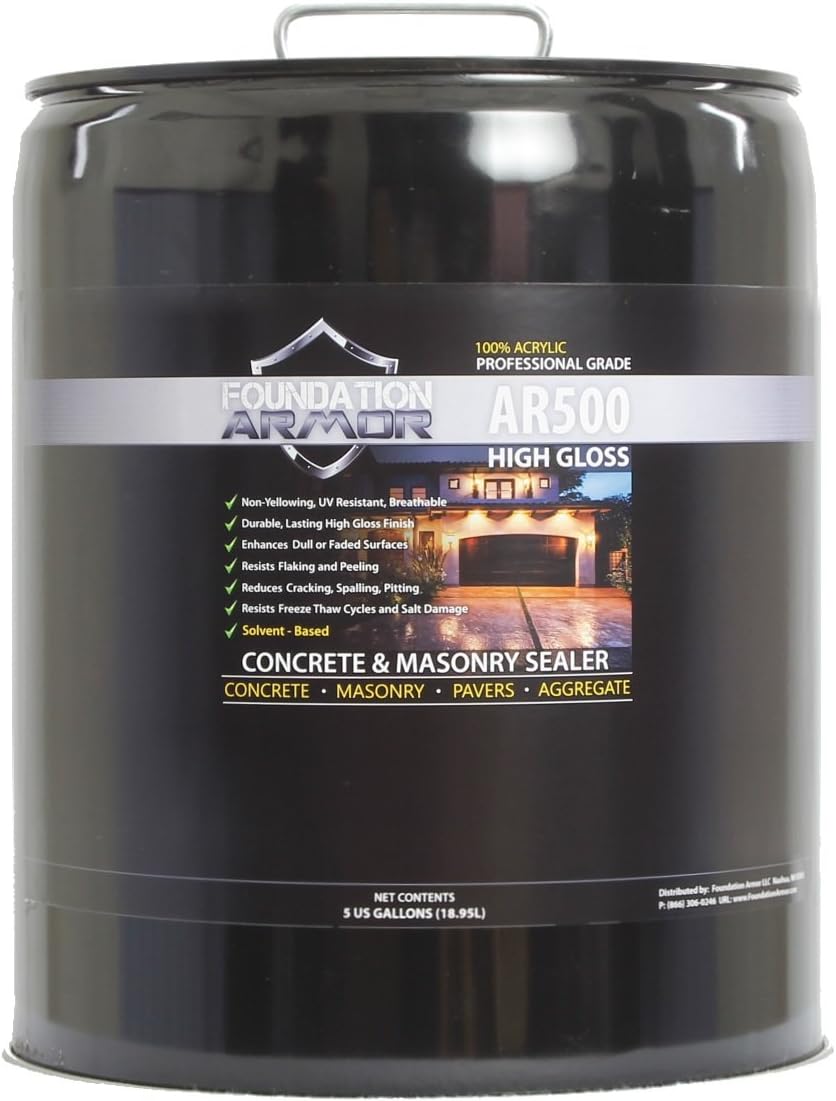
7. Protective Sealer or Finishing Polish
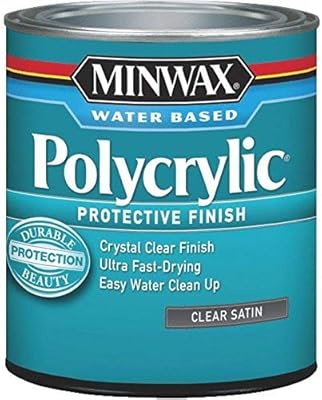
- Minimum of two coats of sealer is appropriate.
- Moreover, wax or any type of floor finish can protect the concrete floor from scratches or scuffs. So, after sealer, you can apply this finishing product for extra protection.
How To Stain Concrete: Patios, Countertops, Pavers
Staining concrete surfaces has all the same steps, but since there are some specific points to each type of surface, we brought you this section regarding staining on these specific surfaces.
Concrete Patio
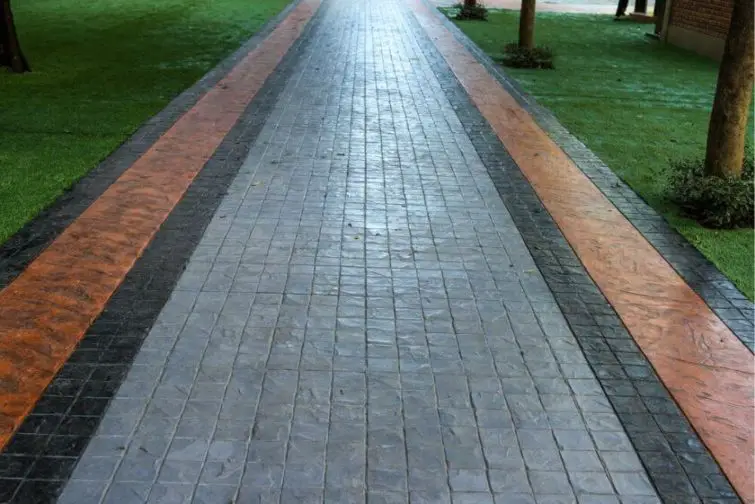
For stained concrete patio, there’s an endless choice of decorative shades and effects while using water or acid-based stain. Moreover, you can stain your concrete floor or patio to look like wood, stone, or marble surface.
Decorative Addition:
For setting your patio off, you can add a stained border all around the patio. For example, a patio with 600 square feet and a series of steps can be designed for a unique look.
- First, beige shade with walnut release can be used to stain the surface then ebony acid stain for the borders.
- Next, ashlar slate stamps for different patterns and texture.
Natural Stone Look:
Nowadays, it is quite easier to create an imitation of natural wood on your concrete patio. With many shades, patterns, and tools, you can customize your concrete floor, patio, or driveway.
- After cleaning and etching the surface area, make sure to use a bonding primer. Follow the instructions on the label precisely, and go through the upper section of this article for prepping the concrete for stain.
- For mimicking a stone look, firstly, create a pattern using painter’s tape. Natural stone has more effect on a tiled pattern. Make sure to represent grout structures for a finished look.
- For a custom shade, you need two or more stain shades.
- Choose the lighter shade and spray it all over the concrete with a pump sprayer. From a circular motion, mist over a small space before moving onto adjacent space.
- For making the natural stone look precise, make sure to not stain uniformly. A realistic look can be achieved through mottling and variance.
- Let it dry for almost 6 hours or more if the product label suggests, before staining the next coat.
- Next is staining the darker shade. Spray it over the concrete in the same way as before. Ensure lightly misting in order to prevent too much opaque color.
- There should be a blend of both shades for a natural stone appearance. Therefore, gently blend the darker shade with the base color using the same technique.
- After it is dry, finish it off with a sealer or clear top-coat for the stain to last long and give your concrete patio a shine.
Mimic Marble
Concrete stains are multifaceted; thus, it can be used to create different unique designs. There are some steps that can make your concrete floor, patio, or driveway to look like marble.
- Firstly, you need to select the acid stain colors you want to use. It matters if you intend to mimic the natural look of marble or just simply replicate the concrete shade with your home décor.
- Before fully committing to the project, test it on a slab to check whether the stains create the look you are looking for.
- Acid stains are appropriate because it is easier to get a marbling effect from it. Also, the design is more noticeable on the concrete surface with this type of stain.
- Then, fully prep the concrete by cleaning whatever you need to get a smooth surface. (For further details about cleaning, look in the upper section, or if you intend to clean a certain stain, have a look down below.)
- There are two ways to apply acid stain: pump-up or mix and pour.
- However, if you use a mix of techniques while staining, then you can get creative with your design.
- Moreover, if you use a mix and pour system, then when you wash the surface, stained areas become diluted or enhanced, and you get a water-swept-finish.
- Make sure to saturate the concrete surface with sufficient stain.
- Create a design by pouring one after another stain color, or if you are using a sprayer, then all different stains need to be in their own sprayer.
- Before introducing stain to your concrete, dampen it with water then apply the base color. On top, apply a mix of two colors to implicate graining design like in marble.
- Always keep on blending with the next color to follow through the marble look.
- For a highlighter, use a different stain for the pattern and leave the base stain exposed in some areas to give the finish more depth.
Stain Suggestions:
- Solvent Sealer: satin finish acrylic concrete. Cola, Coffee brown, and shifting acid stains.
- Sealer: High Gloss acrylic. A mix of colors: Black and cola. Base color: Dessert Amber and Azure Blue acid stains.
- Overlay of Malayan buff and coffee brown acid stains.
- Base color: Dessert Amber. A mix of stains: English red and cola. Highlighter: Seagrass. Sealer: Satin Acrylic
Concrete Countertop
If you are the type of person to handle renovating countertops on your own regardless of a heavy workload, then this section will be very helpful. However, it is time-consuming, might take up to 9 weeks, although the end result will be satisfying.
So, let’s start with acid staining concrete countertops.

Materials needed: Preferred several acid stains (check suggestions in the upper section), organic concrete cleaner, protective gear, sprayer, brush, neutralizer, and water-based concrete sealer.
- First, use a cleaner to wash the concrete countertop. There’s no need to make sure the surface is completely dry as acid stains best work when the surface is somewhat wet.
- Ensure you are covered with protective gloves, goggles before touching the acid stains.
- Next, fill up the pump sprayer (plastic) with acid stain carefully.
- Then, spray on the countertops. If your target is a light shade, diluting the stain is necessary. You will see fizzing when the stain is applied to the concrete. However, if not, pour additional stain in the solution.
- For multiple countertops, keep track of activation periods.
- For darker stain color, use a brush to stain into the countertop in a circular motion. For a more diffused look, spray the acid stain only without any use of a brush.
- Then, let the stain dry and react with concrete. It wouldn’t hurt to leave the stain for a long time; however, make sure it is not less than the required activation time.
- After the acid stain has dried and reacted well with concrete, use the neutralizer to stop the stain from reacting further and clean the surface.
- At last, seal the concrete countertops with the water-based polyurethane concrete sealer.
Tips:
- Make sure to always start staining with the base color or the lightest shades. Then move onto the darker shades.
- For a unique design, use the same stain in several layers and dry it in the different activation time.
- Multiple applying techniques and tools will give the stained concrete more depth and design. You can use brushes, sponges, and spray bottles to stain layers.
Now, let’s get to staining concrete countertop with a water-based stain.
Materials Needed: Super Concrete Renovator SCR, rough sand, Xtreme Series Slurry, Water-based stain or Eco stain, Lithium Densifier, sprayer, sponge, rag, concrete sealer.
- First of all, profile the concrete countertop with a diluted mixture of water and SCR with a ratio of 3:1.
- Then sand the surface to remove any excess bits of burrs.
- Again, wash the surface with diluted SCR and let it dry for 30 minutes.
- Then fill any holes with a mixture of Xtreme Series Slurry.
- Next, repeat sanding with 400 grit sandpaper.
- Apply a layer of lithium densifier to the concrete surface then rinse it off with clean water before LD dries.
- Now, apply the Eco stain or water-based stain with sprayer, sponge, or rag.
- After it is dried, seal the concrete with a penetrating sealer.
Concrete Pavers
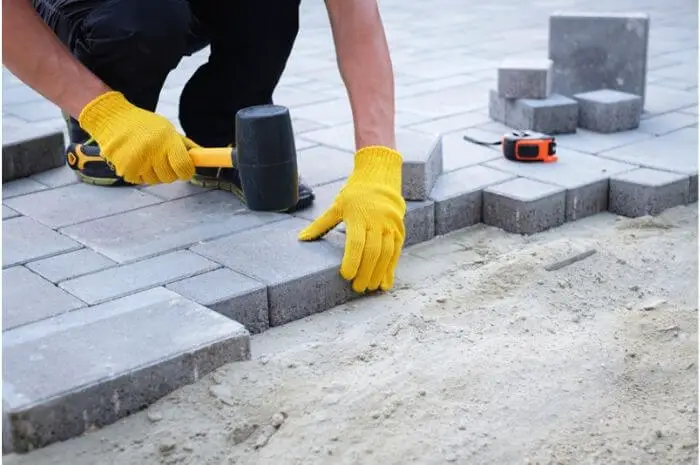
Pavers create a unique look for your outdoor space; however, staining the pavers customizes them according to your preference and space.
Materials & Tools Needed: Concrete stain or dye, concrete sealant, painter’s tape, paint tray, roller, and drop cloth.
- First of all, if you intend to create your design, then tape off the pavers in certain areas to keep the original color of the pavers.
- Then, apply the darker stain with the roller on the areas you want to stain.
- Make sure to stain the edges too.
- Once the stain is dry, take off the tapes from the pavers.
- Next, apply the sealant with a roller on certain areas you want to keep lighter shade.
- Multiple coats of the sealant make your paver glossier.
- Lastly, place the pavers in your desired pattern.
How To Remove Stain From Concrete
Often, concrete gathers up unwanted substances. Both indoor and outdoor locations are prone to contaminants. Hence, we need to take care of it before staining again on the already stained surface.
This is how you can prep concrete for stain as well. However, different contaminants require different methods and materials; thus, the following will help you.
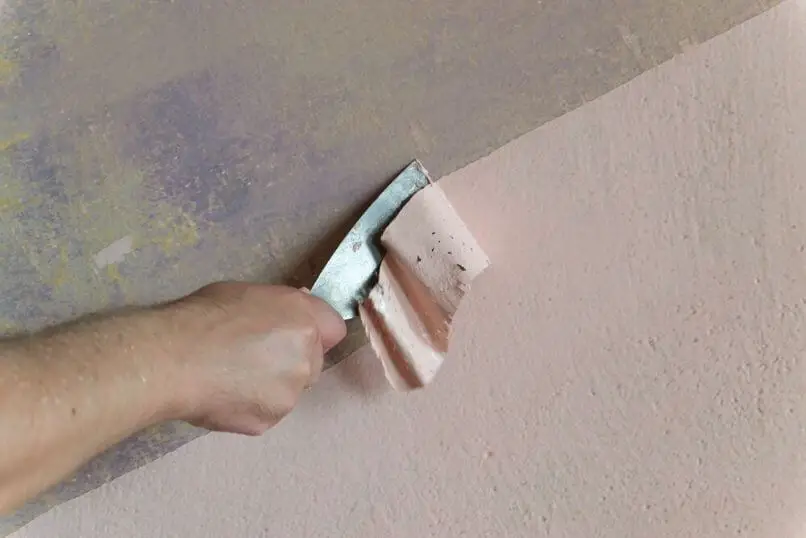
Previously Sealed Concrete
The sealer needs to be gone before you stain the concrete because your new stain would not sit on it.
-
- For removing, you need Xylene, otherwise known as Topline/Xylol.
- Pour the Xylene on the concrete.
- Let it dry for half an hour or so.
- Next, scrub the surface with a brush (preferably stiff straw ones).
- Then, gather the scraped sealers into a pile by the painter’s shield.
- Remove the pile with shovel (preferably square point ones).
- Next, pour the Xylene solution once again and repeat all the steps after it.
- If your concrete surface is old and outside, such as a patio, you need to powerwash the sealer’s elements off the edge of the concrete surface.
Oil or Grease Stain
This type of stain stays within the concrete for a long time. Therefore, regardless of old or new concrete, oil, petroleum, or grease stains need to be cleaned off before you stain to get a better result.
There are some possible ways on how to remove oil stain from concrete:
Detergent:
For small oil stains or spills, all you need is a sponge, scrub brush, and a strong detergent. Simply wash off the grease with just three items.
Concrete degreaser or cleaner:
It is specifically designed for removing oil stains from concrete. It works aggressively with its concentrated soap solution of alkaline. The soap is scrubbed into the concrete and loosens the particles of oil so that it can be removed easily. However, it is not effective enough for concretes with high contamination and dense finishing.
Concrete Stain Prep:
Degreaser is a naturally made solvent that cleans the concrete deeply from within by lifting the oil or petroleum elements from the pores. Simply, apply it and dry it for five minutes. However, if the stain is on old concrete, or has been for a long time on certain areas with a heavy amount of oil and grease, or tire marks, then 30 minutes is sufficient for the solvent to work. Scrub the affected area thoroughly with a stiff brush or buffing equipment. Then, finish it off with a coat of TSP and rinse with water multiple times for a new and clean look.
Glue, Paint & Any Sticky Stain
Often renovations bring about sticky substances from floor carpets to old paint, and it is a hurdle that demands some work before you get to your renovation part. Thus, we bring you a couple of steps to deal with this clingy, unwanted element.
Strip or Scrape:
- With a paint stripper, simply remove the paint stain; however, you need to apply some strength to remove all residue. Also, use a stripper depending on the type of paint stain, such as oil or water-based.
- The paint stripper might need approximately 8 hours or just a couple of minutes, depending on the state of concrete and paint.
- With a razor-edged scraper, scrape the glue stain off the concrete deeply with force.
- Then sweep away the loosened glue chunks or bits of paints thoroughly.
Boiling Water:
- Pouring boiling water on dry glue stains helps it loosen the glue remains. Let the hot water stay on the concrete for 2 minutes and clean it off, but remember to be careful while dealing with hot water.
Floor Scrubber:
- Moistened glue is easy to scrub off with a concrete scrubber though scraper can be alternative and still be used. Keep the glue stain wet while scrubbing so that it easily comes off.
- For paint stains on driveways or patios, it is better to use a pressure washer to scrub off the remains.
Soda Blasting;
- For large painted areas, this is more effective and environmentally safe and will not damage the concrete underneath.
- All you need are pot blaster and sodium bicarbonate. Just simply blast all over the area, moving the nozzle evenly throughout the surface. However, make sure to obtain a respirator as the fume can be too much.
Glue Remover
- If the glue is too stiffened for hot water, then use mastic or glue remover. As this has chemicals in it, it softens the glue, but it can be harmful to the fumes.
- Thus, read the product’s label for proper direction and warnings. Also, ensure precaution and ventilation.
Sand the Concrete
- After going through the methods above, you need to sand the concrete for the pores to be clear and surface to be smooth for a new coating.
Wood Stain
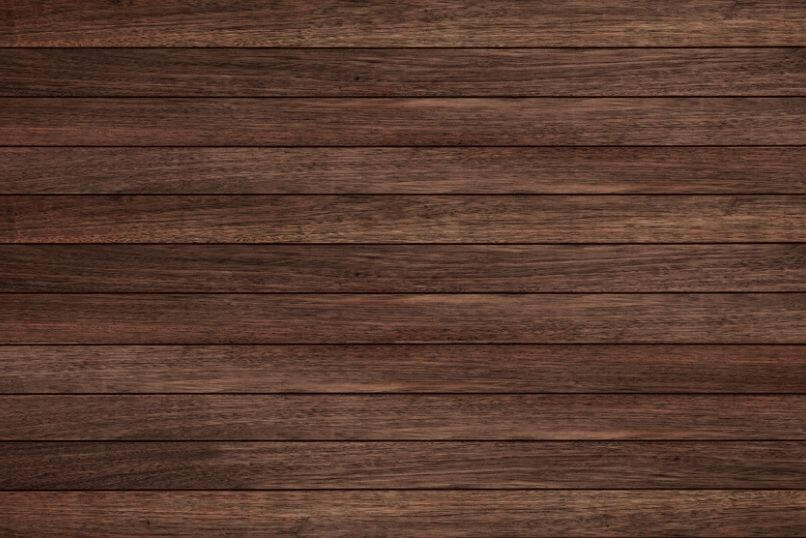
Let’s say for some reason; there’s a wood stain on your concrete surface. It is not worrisome as there are various ways to remove the wood stain. We will show you three methods on how to get the wood stain off the concrete.
Choose the method which best suits your stained area and the amount of time you have considering the products.
Bleaching Method:
Materials Needed: Oxalic Acid, rubber gloves, goggles, bucket, and water and scrub brush with a long handle.
- Oxalic acid is different than household bleach as it is a bleach for wood only.
- Before interacting with any chemicals, ensure you are covered with protective gear. Also, the work area needs to be properly ventilated to prevent harm from fumes.
- As par, the instructions from the bleach manufacturer, mix the contents and get it ready for applying.
- Next, apply the bleach mixture on the wood stain over your concrete surface by using the long-handled brush.
- Let it dry for about 15 minutes.
- At last, wash away the stain from the concrete by rinsing it with water.
Muriatic Acid Method:
Materials Needed: Muriatic, aka hydrochloric acid, protective goggles, gloves, water, bucket, concrete sealant.
- First of all, make sure you are taking precautions by wearing all the necessary items.
- Next, make a mixture of the acid and water with a ratio of 1:20, respectively.
- Then, clean the wood stain with acid and water mixture.
- In case the stain doesn’t come off, make the mixture strong by changing the ratio, such as 1:19. Keep on lessening the ratio of water until the mixture is strong enough to remove the wood stain on concrete.
- Next, rinse the whole area with clean water since there will be powdery remnants from the acid mixture.
- Lastly, use a concrete sealant to prevent any future stain. Follow the instructions from the manufacturer on this step.
Sand Blasting Method:
Materials Needed: Sandblaster, protective gear, water.
- Firstly, you need a sandblaster. You can always rent one from any hardware store in your area.
- When the stain is dried, use the sandblast to blast it off the concrete.
- Then, simply sweep the surface or wash the sand away with water.
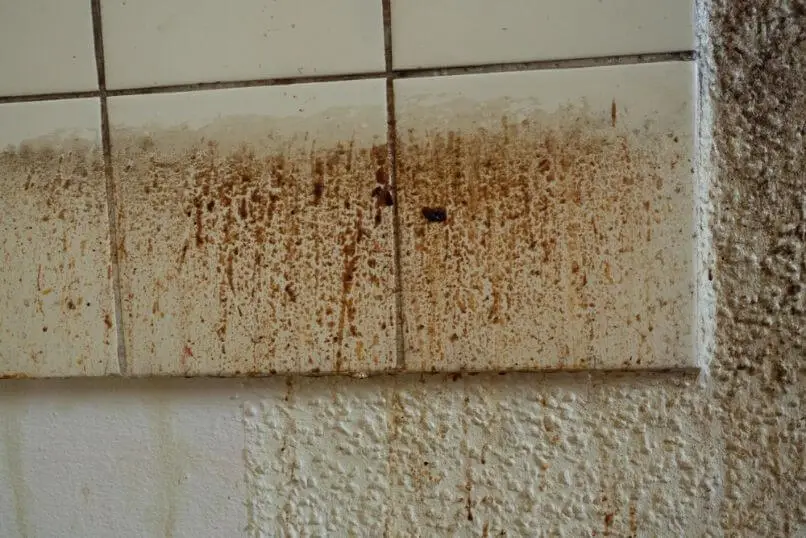
Rust Stain
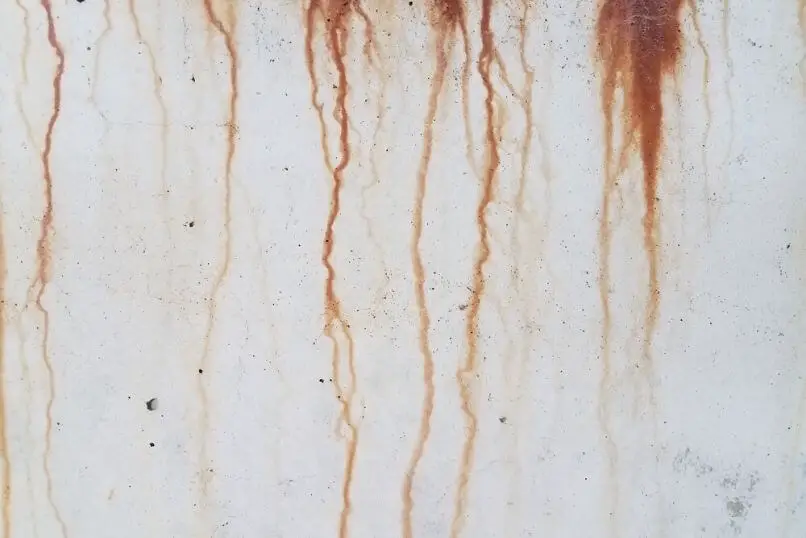
Homeowners face this common problem as people use water often for various reasons. Where there’s the use of water, there will be rust, which is an eyesore. Thus, here’s some ways to remove rust stain off the concrete.
For Minor Stains
- First, you have to rinse and clean the affected concrete with soap and water. Let it dry before moving onto the next step.
- Over the rusted area, spray or pour lemon juice. Citric acid works as a cleaning agent for rust. Dry for 10 minutes, then scrub it off with a wire brush.
- If the stain is tough, opt for white vinegar instead of lemon juice. Spray or pour it, then let it dry for few minutes before scrubbing with the wire brush. Then wash it away with cold water.
- If the wire brush isn’t easy to use, then you can use a sponge.
For Major Stains
- First of all, rinse the concrete and dry it before applying any commercial cleaners.
- Also, wear protective gloves and goggles, and make sure the workplace is well-ventilated.
- Then, use a commercial cleaner containing oxalic acid. Usually, this cleaner comes in powder or liquid form.
- If liquid form, spray it over the concrete. However, if powder form, make it wet with water. Let it sit for several minutes.
- Scrub the concrete surface with a nylon brush with stiff and bristled peaks.
- Then rinse or power wash the concrete.
How Much Does It Cost To Stain Concrete
The cost of staining concrete depends on several factors, for instance: location, concrete condition, design complexity.
On average, a 1000 square foot area of stained concrete costs around $11,000. It can be $3000 for a simpler form of stain; however, it can turn into $18,000 or more if the staining design is complex.
Therefore, we brought you this cost section for all concrete surfaces to give you a heads up.
-
Cost of Staining Concrete Floors

Image: stock.adobe.comIf the concrete is indoor floors, then the cost increases compared to just installing floors. If it is interior floors, then you have to keep in mind the cost of removing the previous flooring, such as hardwood or carpet.
Additionally, staining concrete floors require more color, complex finishes, and stencil work. Moreover, if it is concrete basement floors, then you need to factor in poor ventilation, water-based stain, etc.
| Square Feet | Cost |
| 1 | $11 |
| 500 | $5,500 |
| 800 | $8,800 |
| 1,000 | $11,000 |
-
Cost of Staining Concrete Patio
On average, 256 square feet of concrete patio cost around $2,820. Usually, a sealer is used to minimize the damage from UV rays and extreme weather.
| Film Forming Sealer | Penetrating Sealer |
| Water-based/Solvent-based | Prevents absorption of water |
| Fire, Water, Stain Protection | Protection from Freeze and Thaw |
| $0.25 & $0.50 per square foot | $0.20 & $0.75 per square foot |
| Total Cost for 256 square feet: $2,920 | Total cost for 256 square feet: $2,945 |
-
Cost of Staining Concrete Driveway
The cost varies depending on the design (basic and complex). Here, we estimated on the basis of the basic design.
| Single Driveway | Double Driveway |
| Ranges from $4 to $10 per square foot | Ranges from $8 to $20 per square foot |
| Ranges from $800 to $2,000 for 200 square feet | Ranges from $1,600 to $4,000 for 400 square feet |
-
Cost of Staining Concrete Countertops
Here, many other factors log in the cost such as installations, price of concrete countertops; however, we will list the stain cost only.
| Basic Design | Complex Design |
| $2 to $4 per square foot | Up to $15 per square foot |
-
Cost of Staining Concrete by Stain Type
There are two types of stain for concrete. Both of which work differently and require different methods and tools. For more info on these two stains, check-in the upper sections for description.
Here, we will list the cost of these stains only.
| Acid-Stain Concrete Cost | Water-Based Stain Cost |
| $6 per square foot for basic design | $2 per square foot for the solid stain |
Where to Buy Stain for Concrete

Nowadays, stains are very common in all areas as people venture into different looks for their properties. Staining is a great way to get your desired color for your place.
We all know that technology is a wonder nowadays. You can look into the stains we’ve got listed in our other categories, and choose one accordingly. There are several websites for specific stain companies where you can order their stains or online shops where you can see all stain products from different manufacturers and have your pick.
Moreover, in all areas, there are general hardware or renovation stores containing all products needed for staining.
Not only are you going to be welcomed with a various selection of shades for acid stains or water-based stains, but you can find all the tools needed for staining.
Although, before you grab a stain, bear in mind some factors.
- Make sure you choose the right type of stain for your concrete. Check the condition of your concrete and crosscheck it with the type of stain you choose.
- Get the right amount of stain. It mostly depends on the area of your concrete, and also the condition of the concrete and how much it soaks in the stain. A little bit extra amount than required never hurts anyone. Better be prepared.
- Choose different shades of stain for better results. Multiple-use of different stains creates a unique finished look.
Final Thoughts
People tend to take home renovations on their hands nowadays. It is great to work on your own home as you have all the freedom in the world.
However, you need to be well-informed and prepared for safety and precision.
Through this article, we intend to give you our two cents on how-to-stain-concrete, how-to-remove-stain-from-concrete, cost-of-concrete-stain, and where-to-buy-concrete-stain.
With great regards and luck, we bid you goodbye.
Hopefully, this article aided you in your staining quest. See you again in another article with more info on what you need.