When using the lower quality stain or less absorbing wood for staining, there’s a possibility of its getting patchy. Indeed, the low-quality deck and stain patch the wood faster.
And, the patchiness makes a wooden deck odd-looking and enhances the need to change the deck quickly. Hopefully, you know that!
That’s why you should take the initiative to avoid the patchiness from your wooden deck. Of course, it will cost an incredibly lower price than re-installing the deck stain.
So, how to fix patchy deck stain? If you’re doing this without any help, it might consume a lot of time to finish. Conversely, you can efficiently finish the work when you have basic knowledge of the staining deck.
Now, just keep reading to know how to fix the patchy deck stain with less time and effort.
How to fix blotchy deck stain?
Getting a first-class looking deck is the primary duty of a house owner. Needless to say, containing the good look of a wooden deck is much tougher than getting it.
There are versatile external and internal factors that cause the patchiness of the wooden deck. But how to fix blotchy deck stain? Let’s know that through us!
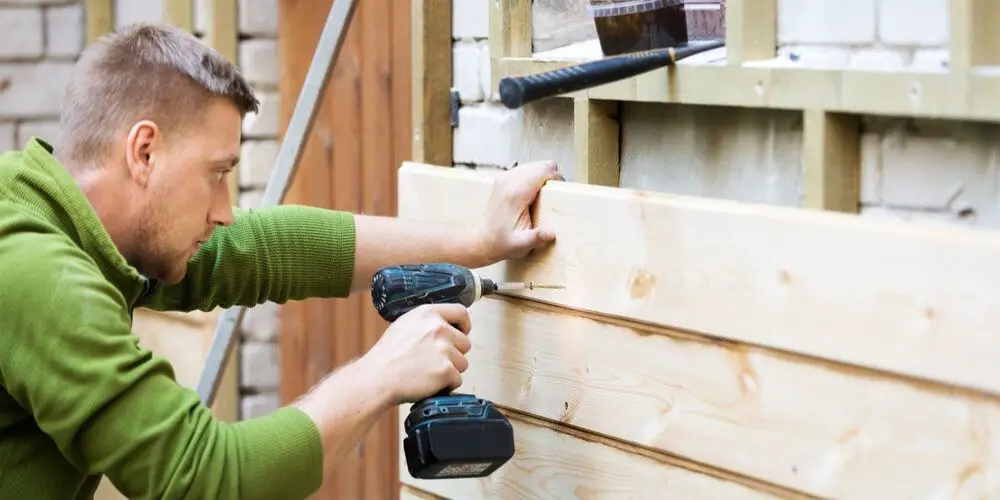
Step 1: Replace the missing wood
To fix your patchy wood stain, at first, you need to take the initiative to replace the missing wood. If there’s missing a large part of the wood, you might have to make more cost than the regular.
Inspect the whole wood deck and determine where you need to fix it at first. Without inspecting if you start to fix your patchy wood, you might make expenditure unnecessarily.
Step 2: Eradicate the unwanted wood
Eradicate the unwanted and damaged wood from the wooden deck at first. You might find such damaged wood that needs to be removed immediately. Otherwise, there may be an undesirable accident because of the damaged deck.
Therefore, before moving to patch a wooden deck, bring out the unwanted wood from the deck. Afterward, take the initiative of placing the right wood on the empty space.
Step 3: Fill the empty place with the perfect wood
When choosing a portion of timber for your wooden deck, make sure it comes from the deck’s same tree. The mismatched wood component might leave the wooden surface look very pathetic. Use the solid glue while adjusting a new timber with space.
Furthermore, measure the empty space of the wooden deck. Maintain the measurement when taking timber for filling the space. This step will contact the wood perfectly with the hole on the wooden deck.
Step 4: Sand the place
Now, it’s time to sand the damaged space of the wooden deck. Sand the rough place of the wooden surface with the solid sandpaper. Use the 180 grit sandpaper when damage on the surface isn’t too serious.
Conversely, apply the quality sander to sand when there’s a deep scratch on the deck. You can also facilitate the sanding by using the 100 grit sandpaper, which comes at a comparatively low price.
Step 5: Clean the place with effect-free material
After sanding, there comes to clean the surface with the effect-free material. The affect-free material includes the rub mineral spirit, which works amazingly to clean the deck.
Use the old rag cloth to apply the rub mineral spirit to make the project perfectly implementable.
Step 6: Moisturize the new part of the timber
The newly installed wooden surface needs to moisturize for enhancing its longevity and smoothness. So, apply the conditioner to smoothen and moisturize the new timber before staining it.
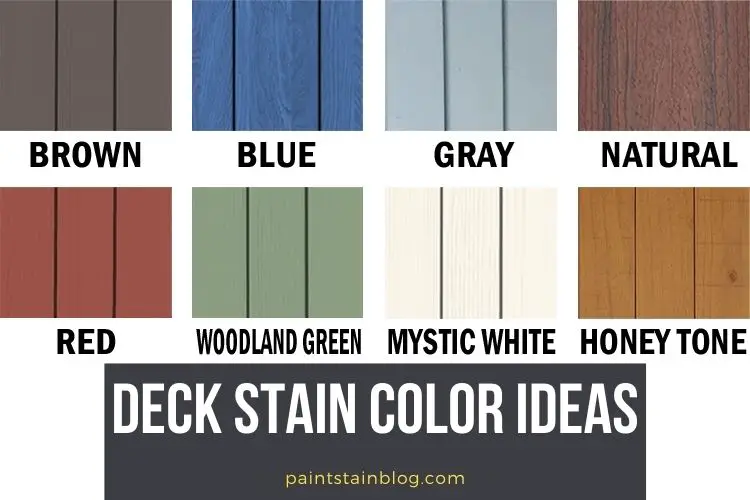
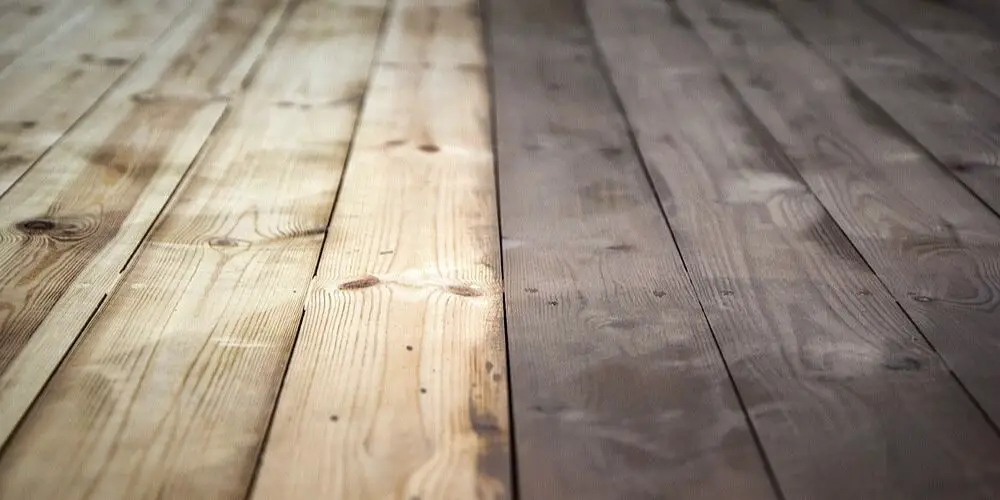
Step 7: Research the right stain color matching with the older deck stain
There comes the right time to stain your newly placed timber. For that, you have to choose the perfect color by matching the older deck stain. It’s a compulsory step to do!
If you mismatch the deck stain color, you cannot have a good-looking smooth deck. That’s why it’s compulsory to concentrate on the previous deck stain color if you’re choosing a new stain.
Step 8: Give a smooth finish
A smooth finish is important while giving the final touch to your wooden deck. You must use the final finishing product to smoothen your wooden deck. And the varnish and Polyurethane is the best component when it comes to smooth the deck.
Of course, you will find some other finishing product to smoothen your wooden deck. Make sure you get the best quality product when purchasing a smoothening material.
No matter which smoothening product you use, make sure it matches with the older wood filler. If the finishing product can be separated from the previous deck color, it’ll keep your wood fixing incomplete.
The sum up!
Indeed, a little scratch or patch can cause big damage to hardly installed wood decks. That’s why you must have to take the mandatory steps to repair the patches of your wooden stain.
But how to fix patchy deck stain without any help? Fixing a patchy deck stain is compulsory, no matter where you need to do so! And if you follow our guidelines above, hopefully, you won’t require any help to finish your fixing.