Staining wood is a beautiful yet terrifying task to have to go through. Let’s look at both sides, shall we?
It’s beautiful because, after staining, you’ll see your wooden exteriors complement each other, beautifying the household with ecstatic harmony. Also, it can reverse or fast forward a wood’s age by applying particular stains.
Now comes the latter part, the terrifying part. Staining, at least for a certain period, is permanent. You can remove and recoat, but in all honesty, that’s back-breaking work.
So, even for a fervent DIY, the task of staining results in heaves of sighs and gulps.
Well, why not let some expert opinion chip in to help you out? Truthfully, the article won’t magically make staining easier, but the pointers we have will surely direct you towards the light!
Hence, this article on how-to-stain-wood intends to prepare you for that staining time.
How to Stain a Deck
Over time, decks tend to lose their original state by constant rain, wind, snow strikes. As the outdoor environment can be harsh at times, it is understandable why decks suffer.
However, proper maintenance does the work for you. Staining can get your deck back to its previous healthy state. Moreover, it enhances its natural wood color.
Therefore, you need to know all the proper steps of staining a deck.
Let’s start by making sure you have the right materials before getting to the applying part.
Materials You Need for Staining A Deck
- A gallon of good quality deck stain; the amount depends on the area of your deck space
- Broom; for cleaning purpose
- Any type of drop cloth; for placing other materials
- Paint pole, paint pad and tray, brush, stirrer, and painter’s tape
- Pressure water; for old decks
After you are done checking the list of materials, let’s get to work.
Step 1- Preparation
- First of all, you need to check if the surface of the deck is completely clear of dust and debris.
- Make sure you are staining on a sunny day so that there’s no chance of rain as it can ruin your deck before staining even starts.
- Then, sweep the surface of the deck thoroughly with a broom.
- However, if your deck is old and weathered, you need to pressure wash it for better results.
Step 2- Planning
- More often, people start staining their deck without a proper plan and mess up while applying the stain.
- Thus, you need to create a plan for the course of stain; as in- you need to determine your starting and stopping point.
- You need particular paths set for easy entry and exit off of the deck.
- This is done to ensure you do not get trapped in any corner of the deck.
Step 3- Precaution
- Before any stains are applied, make sure your exterior walls are covered with painter’s tape.
- Place the tape along the area of your wall where it meets the top of the deck.
- This prevents stains on the wall during the application of deck stain.
Step 4- Procedure
- Place the drop cloth on the area of your deck that you intend to stain at the end.
- Then, put the gallon of stain and paint-pad tray on the designated cloth.
- Next, you need to stir the stain with paint stirrer so that the stain is properly mixed.
- Then, simply pour the stain into the tray.
- At last, attach the paint pole to the paint pad by screwing it into the back of the paint pad. Make sure it is tight so that it does not come loose at the time of application.
Step 5- Paint
- Now, it’s time to apply the stain.
- Simply dip the paint pad into the tray of paint then apply it. Ensure it is a solid coat of stain on the entire deck surface.
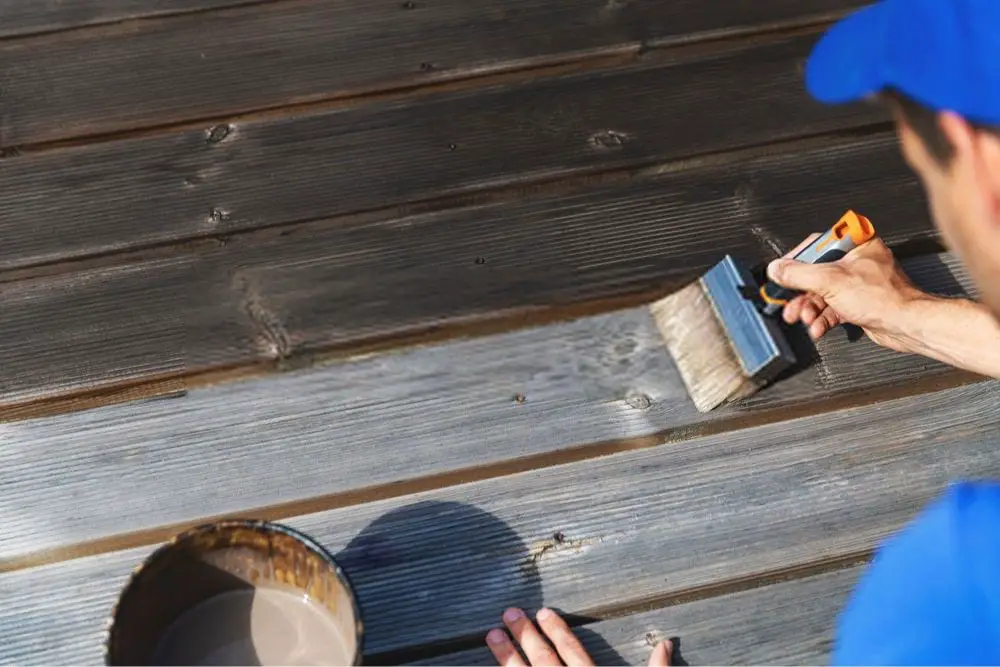
- When the whole surface is complete, use the paint pad to tackle the sides of the deck.
- Use a 3″ paintbrush for the deck surface; however, for the spaces between boards, you might need to use 1″ paintbrush for accurate coverage.
- Finally, just allow the deck stain to dry for 24 hours before using the deck for any purpose.
How to Apply Wood Stain & Darker Stain
Wood stains might seem challenging, but it is quite easy, even for beginners. Typically, there’s only one method that is applicable to all types of wood floors, cabinets, and furniture.
In this section, we are going to list the method and materials for wood stain.

Method:
- First of all, choose the right color of stain for your wood. It is best to try a sample of color on a timber piece.
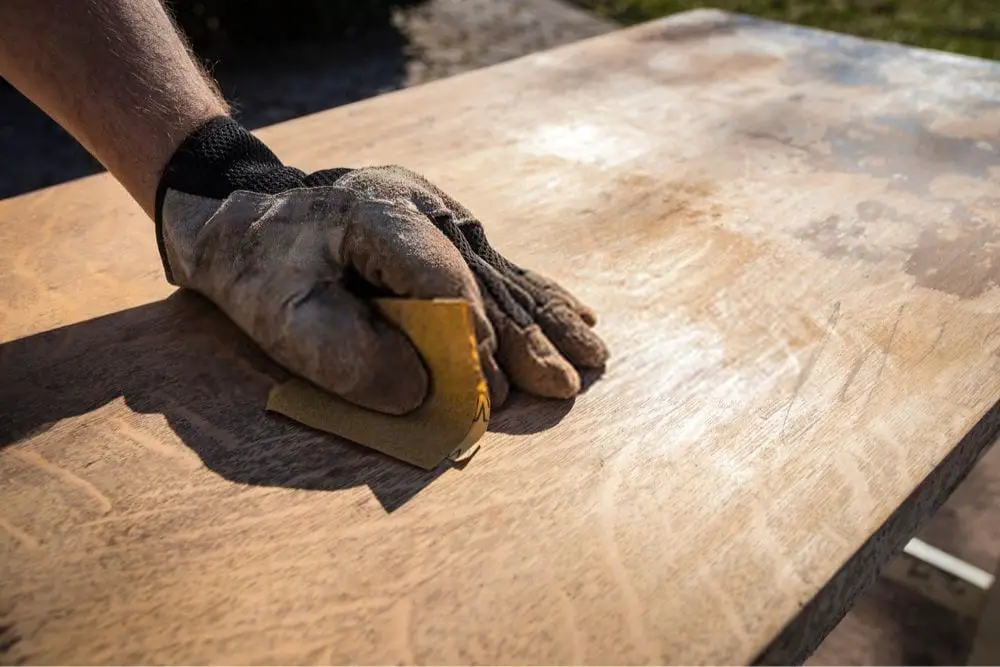
- Next, you need to prepare the wood. If your wood needs sanding, it should be done before staining in order to get a smooth finish and prevent patchy surfaces.
- Also, clean the wood and remove any additional residue or marks by sanding in the same direction; begin with 120-grit sandpaper then move onto 220-grit for a second sanding.
- Then, stir the stain can with a stick or brush so that pigment residue left on the bottom will mix well.
- Prepare all your tools, and transfer the stain to the tray if you are using a roller; however, if you plan to stain with a rag, you need a large tin to dip the rag in comfortably.
- Now simply put the roller or rag into the stain then begin applying to the wooden surface in a circular motion for deep staining.
- First, you should stain with a brush then use the rag for the second coating. In this step, you need to use light movements of hands and a small amount of stain.
- At last, you need the rag to wipe any excess stain off. It provides an even distribution of stain all over the surface.
Tips on Applying Oil-based & Water-based Wood Stain
- Most commonly available stains are oil-based stains as it has both dyes and pigments mixed in with mineral spirits. At all times prior to staining, make sure to vigorously swirl the stain solution in the can to extract the colors and pigments from the bottom to get the full-color from the dye. However, there can be chemicals when dealing with oil-based stains, mostly fumes, so be careful to always work in a well-ventilated environment.
- If you are in an air-tight area, go with a water-based dye, to prevent fumes. One of the benefits of water stain; it comes in a wide range of shades, far more than oil stains. Also, apply a water-based stain that is the same as an oil-based stain. It is possible to apply water-based polish on an oil-based stain, however, must wait for a whole day as the oil-based stain has mineral spirits that need to evaporate. Moreover, if the weather outside is chilly or rainy, remember to let the stain dry for another 24 hours.
- Making a custom color means knowledge of mixing stains. However, all stains need to be produced by the same company, both of which are either water-based or oil-based. Beware not to simply just add the oil and water together. Firstly, measuring the quantities of each stain is required. Then, note them down so that it can be replicated when appropriate.
Types of Rags for Staining
More often, the right stain comes from using the right rags while staining. Usually, the rags are cotton and efficiently work to give even coating of stain. Also, it is quite cheap material.
- Lint-free rags: it is the most common stain rags, otherwise known as white cotton t-shirts. For its white color, it is an ideal choice as the stain color will be visible.
- Recovered white polo: rags made from these are also suitable because of the white color as it prevents color bleeding. However, if you are going for cost-effective, you can try out a grey t-shirt.
- Paper wipes: it might not be the most popular form of a rag, but it is super absorbent and can be disposed of effortlessly.
- Amber knits: it is larger compared to other types of rags; it can be torn into smaller pieces for more uses. Also, since it is pre-washed already, it increases absorbency.
Easy Method for Darker Stain on Wood
People often have a different preference in terms of their stain color. The shade of wooden decks or furniture depends on many factors.
You can easily take specific steps to enhance the stain color and make it darker to your preference.
- Increase the amount of pigment in the stain; when the ratio of pigment is higher, the coloring of the wood will be darker.
- In addition, oil-based pigments with oil-based stain work best in darkening wood stain.
- Leaving wood stain for a long period helps few of the thinner to disappear, which then increases the pigment ratio.
- After the first coat of stain is dried completely; it is best to apply another coat of stain. Usually, it gives a darker coloring.
- Also, glaze or gel stain can be substituted for liquid one as it includes pigment with a higher ratio.
- Rough grits make more space for pigments to enter; thus, sanding the wood to a harsher grit in the same direction of the grain helps.
- Ignoring to wipe excess stain leaves the stain slightly wet that creates a darker shade; however, it can give the stain a poor connection to the wood if the excess stain is too thick.
- Also, wetting the wood with water prior to staining allows the grain to rise and make a harsh surface. The alternative and comfortable choice could be using a water-based stain.
- After staining, use a toner with dye. If the toner is sprayed between coatings, the stain gets darker without letting the pigment become muddy.
How to Stain Unfinished Wooden Objects
For any type of unfinished wood, staining can be quite comfortable after a little bit of care. If you are looking for custom shade cabinets, unfinished ones are the way to get to it.
Perhaps, your household consists of some unfinished wooden pieces for flooring, indoor or outdoor. You probably know that unfinished woods aren’t uncommon. Hence, we bring the simplest form of action that is quite similar to staining finished wood.
Although prior to staining unfinished wood, you need to have the right tools and materials.
Adequate Stain Kit
Brush: Foam brushes or bristle brushes may be used. For water-based stain, remember to use brushes with synthetic bristles for better finishes. Do not use natural-bristle brush if you intend to avoid soaked brush, although a natural-bristle brush fits well for oil-based stains.
Sandpaper: All unfinished furniture and cabinets are pre-sanded from the manufacturer, but gentle sanding is also required for the smooth process of staining before using a wood polish. Nevertheless, it is a safe practice to have a variety of different grits on hand. You’ll want to start with medium 180-grit sandpaper while sanding and then switch to finer 200-grit sandpaper.
Paint Stirrer: Also known as stir sticks. It is used for stirring the stain in the can.
Rubber gloves: To keep your hands clear of stain.
Rags: To wipe woods during staining.
Paper Towels: While staining, many small inconsistencies arise; thus, you need these to clean and discard easily.
Drop Cloths: It can be used for keeping all your materials over it, so that area of application is clean. An alternative can be newspapers.
Safety Goggles: Stains contain chemicals and fumes that can be harmful if used in a closed area. Therefore, precaution is necessary.
Adequate Workplace
For any wood stain project, you must have a suitable working station.
- Always work in open space or a well-aerated area to rid stain fumes.
- The working area needs to be well-lit with proper lights.
- Work in a dry or warm place so that dry items are in good condition as the damp area can ruin the state of those items.
Surface Sanding
Before you get on with staining unfinished wood, you must sand unfinished pieces delicately to remove surface fuzz or coarseness, which can appear as soon as you apply the stain.
- Remember, sanding should be done in the same direction as grain direction.
- Oak, alder and para wood need to be sanded with mild sandpaper, typically with a 180-grit for a finer surface.
- In case of using wood filler to cover nicks or gaps, all the remnants of wood fill must be sanded off for the stain to be applied correctly, or else the surrounding region might look blotchy or lumpy.
- A handy technique for detecting glue and putty traces is the use of a black light.
- For cabinets, remove all hardware such as knobs, hinges, or pulls before sanding; however, avoid adjustment screws.
- Once you arrive at a butt joint of an unfinished cabinet, for example, when a door rail encounters a stile, sand the rail over the crown of the stile and then start sanding the railing to avoid the minute scratches from the sandpaper.
- Once sanding is finished, vacuum the wooden pieces to remove all dust by a tack cloth.
Staining Process
All steps for staining unfinished wood are similar to the applying wood stain in the upper section.
Although, staining unfinished cabinets or furniture require different time set and few other considerations mentioned in the following.
- To enable the wood to absorb stain uniformly, use a coat of pre-stain conditioner.
- For lifting doors, cabinets, wood scraps- you should keep them above the floor.
- Gather up one of your cut rag squares and use it to clean the conditioner. Make sure to use disposable latex gloves.
- The pre-stain conditioner needs to be soaked in for 10 minutes, then if there are any excess elements left on the surface, simply wipe it off.
- Remember to use the painter’s tape to cover areas where the interior of the cabinet reaches the face frame.
- A top-quality brush is not a necessity while adding stain; however, you still shouldn’t use super-cheap disposal brushes that appear to shed bristles.
- A traditional paintbrush can be used, but the disposable foam brushes are very inexpensive, compact, and serve its function.
- Time to apply the stain to one top layer at a time, then wait approximately five minutes. The more you let the stain soak in, the darker it gets.
- Wear gloves then wipe the stain with a clean white cotton rag.
- The stain needs to dry for a minimum of 4 hours. If you want to make the stain darker, then do one more coating and clean it again.
- For doors, stain one side at a time. Let the stain dry until you turn it to stain another side.
- Use wipe-on Polyurethane for the final polish. Do a total of 2 or 3 coats of this wipe-on poly.
How to Stain Wood Floors Grey
Nowadays, Grey Hardwood flooring is trendy and totally in style. It is a bit tricky for staining grey on wood floors; however, we intend to take the steps easier, so you get what you desire.
Know the Right Wood
Woods come in many varieties, not all of them are applicable for a grey stain. Before purchasing any wood or staining your current wood flooring, you must check whether that species of wood is right for your purpose.
- For background, it is easy to stain grey on pre-finished birch or maple woods as it has closed pores and absorbs stain in different ways.
- However, all stain on maple floors will look blotchy for it has closed pores, and if you stain the same product on oak flooring, this will make it brown rather than grey.
- Although, white oak can have that grey shade if done properly. On Red oak wood, you need a darker shade of grey to stain.
- For pine floors, you need a deep grey to wipe out the yellow to bring the grey out.
Test the Samples
Firstly, the stain is a mixture of whitewash & ebony. Before making any decision, you need to test the different levels of grey shade to find the right stain.
The right level of grey depends on your choice; there are light grey, dark grey, or something that meets both in the middle. Therefore, always test the grey stains on the hardwood floors to differentiate and decide.
Use Polyurethanes
It is best to use a pre-stain conditioner to keep your wood intact.
For a durable finish, use water-based poly instead of oil-based ones, the latter one can turn your wood floors yellow-ish, and wouldn’t comply with the grey stain.
Water-based poly might cost more, but it lasts longer, dries quickly, and is effective in its work. Most often, you add an extra coating of this poly for more results.
Stain the Floors
Like every other method of staining in the upper sections, staining grey is no different. It’s the process of choosing the right wood and shade of grey stain that is important for staining floors grey.
Nonetheless, here’s a short synopsis:
- First of all, sanding should be precise and immaculate.
- Then, the stain should be applied consistently and carefully.
- Apply the grey stain in strips to prevent cross-grain or color variants.
- Stains need to be dried for a minimum of 24 hours; however, the level of grey stain might be a factor for drying time. For further info, check the manufacturer’s specifications.
How to Stain Already Stained Furniture
Stain over stain is always possible. People often tend to change their likings, choices.
There could be different explanations: perhaps you want to fit a particular piece of furniture to your decor, upgrade a dull room, or re-style an outdated one.
Whatever the reason may be, this section will help you decide what to do when you need to turn your vision into a reality.
First of all, you need to choose a stain that works for you.
- Check the color always first on a small area of your stained wood to verify results. You should emphasize heavily on this, as each piece of wood can embrace different colors differently.
- Color testing is especially important when coating stains over an existing stained surface, as it is a mixture of old and new shades of stain.
- Assess whether you want your piece lightened or darkened. If what you want is a darker color, stain on the stain is good to go.
- Also, if you simply wish to adjust the tone of your color without darkening it, i.e., make it red or brown, other shades of stain will help.
- Lightening the paint can be a hard nut to cut. It isn’t as easy as adding a bright paint over it as you need to strip the original polish first.
- Check for adhesion. In case the wood you are re-staining already has a clear protective coating, before applying another stain, you need to test for corrosion.
Additionally, if your current finish is a lighter tone of wood similar to Natural, Golden Oak, Puritan Pine, Golden Pecan, Ipswich Pine, Fruitwood, Early American, Driftwood, Cherry, or Pickled Oak colors, it is very easy to change colors with different stains.
Secondly, prepare the wood for re-stain.
- In case the wood is dusty, ensure it is adequately washed with wood cabinet cleaner then wipe it with a soft cloth first.
- Unless the wood has recently been dyed, avoid washing because the cleaner may absorb or dilute the dyes.
- Also, refrain from bruising or sanding if the wood has been stained recently. This will strip the color from the edges that make the overall appearance inconsistent.
Applying stain over stain is similar to merely using it on wood in the first go. Follow the previous methods in the upper sections.
How to Restore & Treat Weathered Old Deck
As the deck is an outdoor element, serving as an oasis in harsh weather, it can damage over time. However, your shabby deck will not be a reason for your shame since we bring the remedy for it.
It does not require professional skills or a long time to revive your deck and make it a brand new one. Simple steps are enough to get to it.
Make Proper Repairs
- First of all, you need to do a thorough inspection of the deck wood’s condition and check for structural damage.
- Focus on the places that are connected to the ground or soil; for example, low-level joists, posts, and stair stringers.
- Also, you need to check the direct contact between the wall of the house and deck.
- Moisture can cause rotting of a joist, and rusting of screws and bolts. Therefore, look for any sign of rots by pushing the screwdriver.
- Strengthen the bolts that connect the deck to the frame of the house, search for any damaged, bent, or rusted flashing.
- Also, check the inside and out carefully for any unmistakable black stains that indicate moisture is making its way into the wall of your home.
- Next, check for popped nails and, if need be, replace it with fresh screws.
- Then, the railings of the deck also need to be inspected for any loose wood.
Clean Deck Surface
Decks usually need to be washed annually. If it is appropriately cleaned from time to time, woods would not need extreme cleaning; however, there are still tricks to cleaning thoroughly.
- Most often, deck cleaners are enough to wash off all dirt and residue of weather damage properly. Some can be used by directly hooking it up with a garden hose, and others need to be applied by a bristle brush.
- We highly recommend you to wear protective gear while dealing with deck cleaners as most have chemical solutions. Also, cover the surrounding items and plants.
- To tackle difficult stains, all you need is to pressure wash the deck, and also, it is the easiest way to rid any sun-damaged wood textures and handle a wipe-resistant-stain.
- Use a rigid brush to clean the wood fibers, and then you must rinse the deck as the wood boards should be kept moist to function efficiently with the cleaning solution.
All deck cleaners contain different chemical solutions that are distinctive in their functions, considering the kind of deck stain. Therefore, you need to know which one to use for your deck.
- Oxalic Acid: It is quite efficient in eliminating brownish tannins and iron stains that often arise with decks made from cedar and redwood. However, it is not useful against mildew, so it is necessary to use this acid after a bleach solution cleaner. Also, this acid is mainly contained in deck brighteners.
- Sodium Hypochlorite: While mostly useful for mildew removal, it is not efficacious for removing dirt or stains. Thus, you need a detergent that is free of ammonia. After using this particular chemical, thoroughly clean the deck by rinsing as it can ruin the deck wood, such as fuzzing, fumes, and greying.
- Sodium Hydroxide: It is often recognized as Lye. It is the main component in several polish lifters or finish-removers. Beware of time as it can damage the wood if left too long.
- Sodium Percarbonate: Hydrogen peroxide, which is a bleach-based on oxygen, is formed if this chemical is dissolved in water, and also sodium carbonate that functions as a detergent. It gets rid of dirt, weathered wood, and mildew.
Warning: Refrain from using a detergent containing ammonia as if it is mixed with bleach, poisonous gas is formed. Do not mix ammonia and bleach.
Apply the Stain
- All steps in applying stain on a weathered or old deck are the same as using it on a new deck.
- Although, it is better to use a semi-transparent stain on older decks and require a maximum of three coats of stain for a uniform polish.
- Also, for extra protection, you can apply clear water repellent between coatings.
Redo the Railing
Either construct a whole new railing or add a maintenance-free railing system such as Fiberon that is available in pre-made panels or as kits.
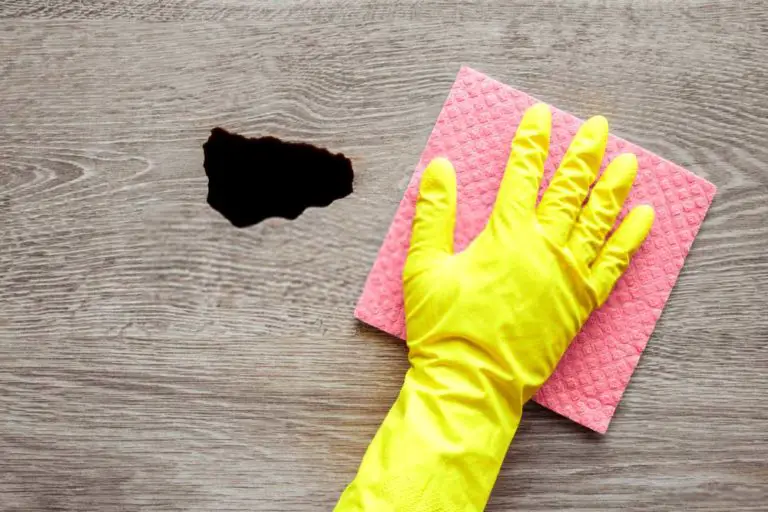
How to Fix Wood Stain Mistakes
For homeowners, staining cannot be picture-perfect all the time. People are bound to make mistakes from time to time; however, there’s a remedy for everything.
Here, we detailed common mistakes with its solutions.
Wrong Stain Color:
Always check stain color on a piece of timber before applying; however, if the wrong stain is used, such as lighter shade, keep on adding more of it to make it darker.
Polyurethane changes the tone of a stain by brown to balance a stain out. Gradually, you can build your stain color.
If you want to go for a lighter shade, you simply need to scrap it because going lighter isn’t possible.
Streaky Stain:
Firstly, you need to strip the streaky stain as much as possible.
For oil-based stain, rub hard with a brush to scrub the surface, also can use naphtha, scotch-Brite pad, minerals spirits.
If it is water-based stain, lacquer thinner is useful for scrubbing the streaks out. Later, re-stain then wipes the excess stain off with rage at once.
Splotchy Wood Surface
Several wood species have sap pockets that cause the timber to soak in the stain inconsistently.
After stripping the splotchy stain area, use a sealer with water-thin containing alcohol and shellac that is de-waxed.
Let the wood saturate in this liquid solution for almost 2 hours then wipe it off. Next, move onto a 100% pigmented stain, i.e., Varathane.
Wood Staining Tricks
- Before applying, shake the wood stain well for a smooth consistency. Also, stir the stain once in a while during application.
- Before purchasing, always test the stain you are buying on a piece of timber or scrap wood.
- While staining the edges, make sure you do not apply a lot of stains as the area can darken in comparison to the middle part of your wood.
- Wood stain can quickly flick if your movements are heavy, which can stain the surroundings. Therefore, tread lightly and carry less amount of stain.
- To prevent blotches, you can try a thin coat of wood conditioner and let it dry for 15 minutes before applying the stain.
- While using a rag, make sure it is dry. During the process, if the rag seems to absorb too much stain, you need a drier rag and continue with it. However, you can use the wet one for more staining in the same area if required.
- Applying varnish before staining makes sure your wood is in the exact state. Also, exert a wood-putty if you need to fill up any gaps in the wood.
- At the end of staining, applying clear varnish gives a nice finishing touch; however, do not use a rag in this case.
Final Thoughts
Staining can be stressful, whether you are a newbie or veteran; the anxiety and shaky-hand syndrome are bound to kick in. However, following the steps with composure will bring you results extraordinaire.
Our article on how to stain wood illustrates the process of staining in the simplest way possible. Adhere to the rules, follow instructions to the letter, and don’t panic if you make a mistake, there are remedies available.
To make the best out of this article, you just need patience and some attention, then, later on, proceed with the action.
Wait, do not forget maintenance. Now, don’t wait for the sun to set- action!


5 Comments
Comments are closed.